| Stale Roti Chaat Mar 11th 2016, 08:18, by noreply@blogger.com (Kusum Sharma) Leftover roti chaat is a very chatpati dish just like dahi vada chaat. Though it seems like papdi chaat but it is more closer to dahi vada. As in papdi chaat we keep little bit crunchiness of papdi but in stale roti chaat we soak completely dried roti into buttermilk till it gets soft. It is very easy and simple to make. Here below is the whole process how we can make it out of a baasi roti:
Ingredients2 lefover dried roti2 cups of whisked curdsalt to taste1 tsp of sugar 1 boiled and diced potatohandful of boiled black channa1/4 tsp of garam masala1/4 tsp of red chili powder1/4 tsp of roasted cumin powder3 tbsp of sweet n sour tamarind chutneyMethod1. Dry the leftover roti in freeze by keeping open in a plate till it dries completely or in sun or in microwave. Earlier it was used to dry in sun.2. Now crush or break it roughly.3. Take 2 cups of whisked curd. Add 1 tsp of sugar and salt and mix. 4. Add the roughly broken pieces of roti into this curd. And soak it for 2-3 hrs or till completely soaked/soft.5. When it is completely soft, add diced potato, black channe, tamarind chutney, and all the other spices earlier written in ingredients list, to it and mix.6. Transfer it into a plate and can be garnished with red chili powder, black cumin powder and cilantro.7. Chatpati leftover roti chaat is ready to serve.TipsUse the tamarind chutney and other spices according to your taste.Enjoy Healthy Cooking!!!See more recipes:Tamarind Paste Bread Tikki Chaat Chatpati Samak rice Chaat Chatpati Oats Chaat Sweet Potato Chaat Chatpati choley Chaat Dahi Bada Chaat Tamarind Fruit raita Loki raita Brinjal Raita Pineapple Raita Bread Boondi Raita Jhatpat Dahi Bada chaat How to make roasted cumin powder Chatpati Tamarind Chutney Channa dal for Pakwans Pakwan ---------------------------Reproduction of the contents of this blog, without permission in whole or in part is strictly prohibited. |  | Mushroom Cheese Sandwich Recipe - Triple Mushroom Sandwich Recipe Mar 11th 2016, 08:13, by noreply@blogger.com (Aarthi)
I was thinking what to make for lunch, i felt like having something cheesy, but was too lazy to make pizza because i have to whip up pizza dough and stuffs like that. So i decided to try out a sandwich recipe which has all the ingredient which we add in a pizza, i also used some mushrooms in it.. And guess what it was a super hit.
I am sure if you make this for your little one they will love it for sure. You can wrap this in foil and give them for lunch as well.
Hope you will give this a try and let me know how it turns out for you..

Preparation Time : 10 mins
Grilling Time : 5 mins Makes : 2 sandwich
Ingredients:
Bread Slices - 6
Olive Oil - 2 tblspn Onion - 1 large sliced thinly
Capsicum - 1/2 sliced thinly Mushrooms - 200 grams sliced thinly Oregano - 1 tsp Salt to taste
Red Chilli Flakes - 1 tsp
Tomato Ketchup - 2 to 3 tblspn Oil for Grilling Mozzarella Cheese - 1 cup grated
Method:
Heat oil in a pan, Add in onions, capsicum and cook them till onions are caramelized. It will take around 10 mins.
Now add in mushroom and cook them down for 5 mins or so.
Now add in oregano, salt, red chilli flakes and mix well. Add in ketchup and mix well.
Take one slice of bread, place some filling in, place cheese on top. Cover with a slice of bread. Now spoon some filling in and top with cheese and place another slice of bread.
Oil a grill maker or a sandwich maker or a tawa. Place the sandwich in and grill for 3 to 4 mins till golden.
Remove it carefully and cut into wedges.Serve.
Pictorial:  | | Take all your ingredients for filling |
 | | saute onions and capsicum in some oil |
 | | Keep mixing |
 | | Cook till onion is caramelized |
 | | Keep cooking |
 | | add in mushrooms |
 | | toss well |
 | | now the mushrooms is cooked |
 | | toss well |
 | | add in oregano |
 | | add in chilli flakes and salt |
 | | add in ketchup |
 | | mix well |
 | | take cheese cube |
 | | grate them |
 | | take your bread slices |
 | | spoon half of the mushroom filling in |
 | | top with cheese |
 | | place another slice of bread over it |
 | | place some mushroom filling in |
 | | top with cheese |
 | | place one more slice |
 | | place it in a oiled grill pan |
 | | cook till done |
 | | Serve |
| | Lemon Infused Vodka Mar 11th 2016, 08:00, by noreply@blogger.com (Kate) When one has lemons galore, it becomes quite important to just "DO SOMETHING!" There was urgency at my house as I do believe that the lemons multiplied each night. If they didn't, they sure weren't eaten by any critter that happened to be passing through.
So, began my quest. When I saw the recipe for Sgroppino al Limon I thought it would be a good beginning. What could be more refreshing on a warm day than a slushy, lemony drink?
It was a great idea but to make the Sgroppino al Limon in the previous post, I needed to make Lemon Infused Vodka which meant that I needed to get with it as it had to infuse for at lease 4-7 days. It is relatively simple. Peel the yellow rind (zest) from the lemon leaving behind the bitter white pith. Pour vodka over the top. Seal.
Lemon Infused Vodka 7-8 small organic, unwaxed lemons (5-6 large) 1 1/2 cups vodka Sterilize a pint-size mason jar, lid and screw band. Wash the lemons. Using a vegetable peeler, remove long strips of zest from the lemons. Remove just the colored part. Avoid the bitter, white pith. Place the strips of zest in the sterilized jar. Fill it with vodka. Close the jar with the sterilized lid. Place in a cool dark location for 5-7 days. Strain out the zest and pour the vodka back into the jar. PRINTABLE RECIPEYou can now make the Sgroppino al Limon or use your infused vodka to make a simple limoncello. You only need to add some sugar..... The new dilemma: What to do with all of the zestless lemons!? Coming soon: Thyme Infused Lemonade! Delicious. | | Sea food Masala Mar 11th 2016, 07:50, by Madraasi Last month I got to have a crab curry prepared by my friend Veena, which was absolutely different in taste, texture, color and aroma which was like the one we have in restaraunts. I liked the curry to the core, and so thought of preparing it by myself. The secret behind the recipe was the masala they prepare, she also added that this masala goes out well with all the seafood both for curry and fry. I tried it at home, it was delicious and something different from what I prepare. Trying different food is something interesting to me. Let me share the recipe of the masala powder… Do check out my other seafood recipes in this link: http://madraasi.com/main-course/non-vegetarian/seafood/ Ingredients: - Ulundam paruppu/Black Lentil/Urad dal – 1 tbsp
- Tuvaram paruppu/Split pigeon pea/Toor dal – 1 tbsp
- Kadala paruppu/Split chickpea/Channa dal – 1 tbsp
- Paasiparuppu/Green Lentil/Moon dal – 1 tbsp
- Red chilies – 9 nos
- Coriander seeds – 3 tbsp
- Cumin seeds – 3 tbsp
- Turmeric powder – 2 tsp
- Black peppercorns/Milagu – ½ tbsp.
- Cloves – 7 nos
- Cinnamon (1” stick) – 4 nos
- Star Anise – 5 nos
Preparation: - Dry roast all the dal/paruppu/lentil together for few mins or until they start turning golden brown or until you get a wonderful aroma.
- Transfer it to a plate, spread it and keep it aside.
- Dry roast all the spices together for few mins or until they start turning the color or until you get a wonderful aroma.
- Transfer it to a plate, spread it and keep it aside.
- Grind it in a mixie, to fine paste once when it comes to room temperature.
- Transfer it to a plate and bring it room temperature.
- Store it in an air-tight container.
You can also prepare this in large quantity and store it in an air tight container. | | Food Bliss: Shrimp Fettuccine with Avocado Cashew Cream Sauce Mar 11th 2016, 07:49, by Marlynn Jayme Schotland A delicious, creamy avocado sauce dresses up comforting shrimp fettucine in a dish that’s easy to make in 30 minutes or less! 
Shrimp pasta is one of my absolute favorite, go-to meals. I make it often for one of my #FastLunch meals while I’m working from home because it’s so quick and easy to whip up, and helps fuel me up for busy work days. It’s also inexpensive, and versatile; I love experimenting with different flavor combinations of sauces to keep things interesting. Lately, I’ve been on an avocado kick. They’re so fresh and ripe in stores right now! I actually had four pieces of avocado toast in one sitting the other day… not my proudest moment, but a yummy moment for sure! I also love cream sauces with shrimp pasta dishes, but since I can no longer have heavy cream (probably for the best!, shouts my love handles) I have been getting creative with different creamy non-dairy sauces. 
Cashew Cream has become a favorite of mine to use in pasta dishes. I keep a jar in my fridge, but I have found that you can soak cashews for as little as 30 minutes and drain, and the cashews are soft enough to pulse in a food processor for a creamy sauce. Combined with avocados, you get a super rich, creamy, slightly nutty sauce without the added calories of the traditional heavy cream. Trust me: you won’t miss it! While the avocado and cashew adds a delicious creamy texture to this fast pasta dish, the lemon and dill add brightness. 
Sprinkle a little grated parmesan cheese on top (or, shredded dairy-free cheese if you are dairy-free!). I also like to chop up extra avocado and extra chopped dill sprigs to sprinkle on top. 
A note on pasta servings: one serving of pasta is typically considered to be two ounces of dry pasta, or one cup of cooked pasta. Honestly, pasta is one of those things I always eyeball. But if you’re a stickler for serving sizes, the kitchn has a great guide to follow.
- Soak cashews in a large bowl covered with water for at least 30 minutes, then drain and set aside.
- Cook pasta according to package directions.
- While the pasta is cooking, heat one tablespoon olive oil in a large skillet. Add shrimp and sauté until cooked through, about 5 minutes. Shrimp will be pink and opaque when it's done. Remove from heat and set aside.
- Add garlic, avocados, cashews, olive oil, lemon juice, lemon zest, dill, and dash of salt and pepper to a food processor. Pulse until ingredients are well mixed and the sauce is smooth.
- Drain pasta, reserving 2-3 tablespoons of the water.
- Combine avocado cashew cream sauce, pasta, reserved water, and shrimp in a large bowl and toss gently until the pasta is coated with the sauce.
- Optional: top with grated parmesan cheese, small pieces of additional cut avocado, and/or salt and pepper to taste.
What’s your favorite type of pasta dish? | | Creamed spinach grilled cheese sandwich Mar 11th 2016, 07:13, by Alida Ryder 
Would you just take a look at that. That melty, luscious spinach and feta filling with a little mozzarella for that extra bit of ooze. Yes please! 
As I’ve mentioned before, I am completely devoted to sandwiches. For so many it’s a quick solution to hunger and is a go-to for lunchboxes all over the world. But this need for convenience has made my beloved sandwich really quiet boring. I mean, there’s nothing wrong with a good cheese sandwich and even a PB&J is simply delectable at the right time but sandwiches can be so much more. And for me, every sandwich is an opportunity to create something fantastic. This is quite obvious when you look at the sandwich section on my blog. 
The inspiration for this particular sandwich came one day when I had a considerable amount of creamed spinach left over from dinner the night before. (Left-over queen, strikes again!) I usually just heat it up and serve it topped with a poached egg but I wanted something different and a little more indulgent that day. I wasn’t actually sure if this would work at all as I was sure the creamed spinach would just ooze out the sides of the sandwich as it was grilling. Even while it was cooking I was very skeptical but then it was cooked and it was glorious. So glorious in fact that C said it was the very best sandwich he had ever (EVER) had. Say whaaat?! That’s a pretty big compliment there folks. It was so good, that I now make double the amount of creamed spinach I normally do just so we can be assured we’ll have these sandwiches the next day. How’s that for devotion? 
| | Princess Cake Mar 11th 2016, 07:00, by Ryan 
I love strawberries and I love cake, so this Princess Cake is really up my alley. No other cake in Sulipan was more decadent and richly sensual than the Princess Cake, according to Chef Gene Gonzalez. This delightful torte with French overtones was one of the highlights of the Sulipan banquet. Layers of freshly baked butter cake were iced with buttercream made luscious with peach and strawberry puree and a “secret” dose of cointreau and coffee. One needs only to sample a small slice to know it is truly worth its title. Be sure to use butter and not margarine. Here is the recipe. Enjoy! Princess Cake For the cake:
1 ½ cups butter
2 ½ cups sugar
9 egg yolks
3 ½ cups cake flour
½ cup cold milk
4 teaspoons baking powder
2 egg whites
Fresh strawberries and peach slices 1) Preheat oven to 350F
2) Cream butter with 1 cup sugar
3) Beat egg yolks and 1 cup sugar until lemon colored. Add to butter mixture. Add flour alternately with milk. Add baking powder. Set aside.
4) Beat egg whites. Gradually beat in ½ cup sugar. Fold creamed mixture into beaten egg whites. Pour into a greased 10” x 14” cake pan. Bake in oven until toothpick inserted in the center of the cake comes out clean.
5) When cool, remove from pan and slice cake in the middle to make two layers. Frost with fruit buttercream icing between layers, top and sides. Garnish with fresh strawberries and slice peaches. Fruit Buttercream Icing 2 ½ cups butter
1 ½ cups sugar
1 cup milk
1 tablespoon instant coffee
2 cups frozen or fresh strawberries
2 cups sliced peach halves
2 tablespoons dark rum
3 tablespoons Cointreau, triple sec or any orange liqueur With a mixer, cream butter and sugar. Gradually add milk and coffee. Fold in strawberries and peaches. Add rum and orange liqueur. | | Gluten Free Lemon Bundt Cake Mar 11th 2016, 07:00, by Jemma 
If there was ever a cake created for all you lemon lovers out there, then this is it! A moist sponge flavoured with lemon juice and zest, drizzled with lemon icing and berries. This cake is so fluffy and soft because of the Greek yoghurt mixed into the sponge. I had 3 attempts at this recipe and, in this case, it was definitely ‘third time lucky.’ Did I forget to mention that it’s gluten-free too, yay! 
While in the baking mood, the sun was shining outside and I could really feel that the first signs of spring were in the air. If like me, you’re eager to shake off the gloom and grey of winter, this cake is certainly going to brighten up your day. Zingy lemon runs through every inch of this cake and I’m so chuffed with how it eventually turned out. 
I’m a total newbie to bundt cakes and I love how pretty the fluted tin makes the cake look. With simple ingredients and minimal effort, this cake was ready and out the oven in 50 minutes. Bundt cakes are brilliant, I’m so impressed with how easy they are to whip up that I’m rather sad that I didn’t discover them earlier. This stunning lidded cake stand from The White Company really sets the cake off, making it the perfect centrepiece at any party or celebration. They stock some wonderful home accessories that I’ve coveted for my home. 
Now you all know that I love my sweet and salty flavours – well, now I have a soft spot for sweet and sour too! The sweetness and fresh lemony flavour really works and they balance each other well. The lemon icing on top isn’t necessary, but I think that it adds that extra little something. Filling the centre with berries not only adds to the decoration, but they taste amazing with the citrus sponge. OK, this may not be the healthiest cake that I’ve ever posted on the blog, however, I’m a firm believer that life would be boring without cake and this recipe is a true testament to that! Have you ever tried making a bundt cake? What would be your idea of a show-stopper cake for a centrepiece at a party? *This recipe was commissioned by The White Company, but all opinions are my own. | | Custard Trifle Mar 11th 2016, 06:42, by noreply@blogger.com (waagmi Soni)
A Trifle is often used for decoration as well as taste, incorporating the bright, layered colors of the fruit, Cakes, Jam and the contrast of the creamy yellow custard and white cream. I love that colors of layers when we serve it to the Family, its eye catching and 99% Nobody will say that annoying 'NO' for this ;) Hahahah...Yes, I also don't like When we make something with so much efforts and love and when a person say No No...So I always try to make my food or any dish which looks good while we present it...This Custard Trifle is nothing, just a layers of different Cakes, Fruits, Cream and Custard....But the looks surely makes a person like 'let's grab it' ;) When you have all the Ingredients ready It takes hardly 15 minutes to assemble ....That's why I like this simply and Royal dessert, which is fuss free and obviously so delicious!!! Well, Frankly speaking I am not a fan of custard....but yes I can have Fruit custard with nuts..[Not so so much, like I am dying to have it..lol ;)] Initially I was not so in to use custard for making this trifle...I asked Hishu that what you want to have in dessert tonight??? Like as usual his answer..."Whatever you like" ...Ohhhhh this annoying reply...Well...again as usual I asked..Plss tell me what you want to have?...And he said what Ingredients you have to make the dessert :) Well, Don't be surprised guys, Though he never cook anything, in spite of Tea, he knows all the ingredients very well..I don't know, How??? ;) I said this, this, that that!!! And OK...He kept mum...After 2 minutes, I had this some of things in my mind and I just told him can I make a Trifle...As I have some fruits and some cakes, and some other ingredients....And within a second he said I want to have custard too in the trifle without fruits ...lol...Being an honest, I was not happy when he said A Custard ;) But Thts ok, As we all ladies do, whatever husband likes We gonna make them Happy...And like all you do I did the same..;)

So using Only Apples for the garnishing, this Trifle is full of Cakes, Cream and Custard. I must say the taste was pretty awesome, You can surely Enjoyy a Trifle without fruits too...A soft, creamy and delicious Dessert to enjoy your after dinner sweet craving and I bet you will love to have it at anytime. Hmmm...If you are so calorie conscious, I will not suggest you to have it ;) Me also so much calorie conscious girl, But yaa sometimes, I just ignore it and next day in gym 4 kms for sure running ;) Give a jump to this yummy dessert Ocean, and Enjoyy yourself in sweet swimming ;) Check out the very simple step by step recipe below and do share your comments for this wonderful dessert recipe !!! :) Ingredients:2 Cup Crumbled Vanilla Sponge cake 2 Cup Crumbled Chocolate Sponge Cake 2 Cup Vanilla Custard 1 Cup Whipped Cream Apple Slices to Garnish
Method:1. Take your choice of Trifle Glasses and make a first level of Crumbled Vanilla Sponge Cake. Press the Crumbled Cake properly and make a perfect layer. 2. Now make another layer of Whipped Cream on the Vanilla Sponge Cake. And Put this layered Glass in a freezer for 5 minutes. (Note: If you are not able to get whipped cream you can simply use thick cream on this layer and after that put this in freezer at least for 15 minutes.)3. The third layer will be of Crumbled chocolate sponge cake, make a nice layer of this cake and at the the top, a fourth layer is Vanilla Custard layer. Spread the Vanilla Custard on Chocolate sponge cake layer nicely and Put this glass in the Fridge...Like same way make another glass and serve them with Some Fruit Slices, cool or chilled. I am serving it with Apple slices. You can use your choice of Fruits too. Note: Trifle is the dessert in which you can make your choice of layers...Like here instead of using another cake layer you can always use some Fruits layer like Banana, mango etc...So, the layer can be of your choice :) One more easy thing, If you have muffins too at home you can crumble them too and use them in this dessert :)Enjoyyyyy this very simple and delicious dessert in this Summer....!!!!!!!!!! | | Cheesy Fish Bites Mar 11th 2016, 06:31, by noreply@blogger.com (Moumita Malla)
My daughter loves to eat fish,as all you know that fish provides a good source of high quality protein and contains many vitamins and minerals. What a satisfactory feeling I have when seeing my little one eat some healthy foods. Stir-fry is the quickest way to get a nutritious meal on the table in minutes. In this recipe, I have marinate the fish pieces with cheese,cream,mayonnaise and a dash of seasoning and then stir fry in less oil. ---------------------------------------------------Author - Moumita Preparation Time - 10 Minutes Marination Time - 30 Minutes Cooking Time - 15 Minutes Servings - 2 ------------------------------------------------------------------------ Ingredients Fish Fillets -2 big or 4 medium (cut into 1inch cubes) Mozzarella cheese -3/4 cup grated Mayonnaise -2 tablespoons Sour cream -1/4 cup Salt to taste Black pepper powder - 1 teaspoon Chilli flakes -1 teaspoon Garlic powder -1 teaspoon (if you do not have garlic powder, then use 1 teaspoon garlic paste) Oil- 2 tablespoons Methods Take a large bowl, combine mayonnaise ,cream, mozzarella cheese, garlic powder or paste,salt,black pepper and chill flakes, mix well. Add fish fillets cubes and mix them until fish pieces get coated with this mixture properly. Keep in refrigerator for 30 minutes .
Place oil in a non-stick frying pan to cover the base. Heat over medium heat.Add pinch of salt (when you deep fry something,add pinch of salt in oil,it absorb lees oil)
Place the fish on one single layer. Cook over medium heat for about 2 minutes each side, until both sides turn opaque white. Don’t over cook the fish. Set aside, covered. Serve hot with any dip, I used mint ,coriander and yoghurt chutney. Want to know more Fish Recipes,Please click HERE | | The Language of Kerala Fish Curry Mar 11th 2016, 06:00 
Kerala, on the south western tip of India is known for vegetarian dishes but the coastline also provides much in the way of fish and seafood. A Kerala fish curry has many versions - as many as there are households but this version is super light with an absence of nuts and coconut cream. This makes it no less temping and delicious. Traditionally made in a clay pot Kerala fish curry typically uses spices like ginger, fenugreek, turmeric and fennel seed. This version is sweetened with mango puree that balances the heat nicely. A couple of decades ago, both the wealthy and poor of Kerala would eat this dish but now with increasing costs of fish due to demand, poorer families do without or use less expensive fish like mackerel and sardines. This version was given to me by a Dear Reader Prerana @piningforlayla. I couldn't wait to make it as it is something that I've eaten at restaurants and very much enjoyed. She linked me to a website and while the recipe was delicious, I felt that the raw onion taste dominated a bit so I reworked the recipe to cook the onions a bit more. I took a bite and it was heavenly delicious and full of goodness. If you love full bodied and flavoured curries that are also a bit lighter on the waistline, then this is for you. You can see that there's hardly any fat added to it apart from some coconut meat and a bit of coconut oil for frying the onions. By now you may have heard of The Secret-it was on Oprah a few years ago. It involves putting something out to the universe only to have the universe answer it. As much as I believe in the after-life, premonitions and intuition I wasn't completely convinced about this. 
It was mid December last year. A reader had sent me a lovely message about the Japan posts that I wrote about a few years ago. I realised that it had been far too long between visits to one of my favourite countries so I said to Mr NQN that I thought that we should go back to Japan for a writing trip in 2016. He's very easy going so he agreed and it was put to the back of my mind as something to look at mid-year. Around this time I asked my friend FreakyFlier to write a story about how to manage your points. I asked him if there was anyone around that offered a service that looked after your points. He said he hadn't heard of any. I sat on the story for a while, not quite ready to push publish. Also around this time, a couple of readers told me about an up and coming area that I just had to visit. I put it on my list on "to dos" (it's a looong list) and thought that I should one day do a story on that area. I just needed to get a list of good eateries together. The a month later mid January something funny happened. I was contacted by the JNTO (Japan National Tourist Organisation). They asked if I wanted to visit Japan! And then on the very same day a man contacted me via Linked in. I looked at his profile and saw that he ran a business looking after frequent flyer points! And then someone from the up and coming destination contacted me with a list of places that she thought I should visit! 
It happened so fast and all on the one day that I was bursting to tell Mr NQN when he returned home. Even non-believer Mr NQN was a bit stunned by the force of the universe! So I'm putting it out there. I'd love to visit India and Sri Lanka one day. I'd love to eat this curry on the shores of Kerala. Because you never know right? Dreams can definitely come true! So tell me Dear Reader, do you believe in The Secret? Have you ever put something out there for it to come true? What would be your current travel dream or dream? Put it out there! You never know what might happen :) x Kerala Fish CurryPreparation time: 20 minutes Cooking time: 30 minutes - 500g/1.1lbs white fish (I used monk fish which has a thick, firm fillet that won't disintegrate)
- 1 lemon
- 1 teaspoon salt
- 1/2 teaspoon brown mustard seeds
- Coconut oil for frying
- 3 medium sized red onions, peeled
- 2 cloves garlic, peeled
- 1 inch ginger, peeled
- 1 tomato, chopped
- 1 mango, peeled
- 1/2 cup meat from a young coconut
- 1.5 cups water, divided
- 2 green chillies
- 1 teaspoon turmeric powder
- 1/2 teaspoon fennel seeds
- 1/4 teaspoon fenugreek seeds
- 2 sprigs curry leaves
Step 1 - Cut the fish into inch wide slices and sprinkle with lemon juice and salt. Drain and put aside. Step 2 - In a chopper, chop the onions, garlic and ginger. Place in a bowl. Then place the tomato, mango, green chillies, coconut meat and process with 1/2 cup of water to form a paste. 
Step 3 - Heat a pot to medium heat. Add the mustard seeds to the dry pan and allow to pop. Remove and set aside. Add a tablespoon of coconut oil and cook the onion, garlic and ginger mix until translucent. Add the turmeric, fennel seeds, fenugreek seeds and the curry leaves. Then add the tomato puree to the pot and 1 cup of water. Heat until boiling and simmer for 8-10 minutes. Add salt for seasoning and stir well. Add mustard seeds back in. Step 4 - ADd the pieces of fish making sure not to stir too much as you don't want to break up. Simmer for 5-8 minutes. Turn off the heat and allow flavours to develop for at last 2 hours before serving with rice. Turmeric Rice - 2 cups uncooked basmati rice
- 1 teaspoon salt
- 2 inches turmeric root, peeled and finely chopped
Step 1 - Rinse the rice until the water runs clear. Add salt and turmeric root and add 2 1/4 cups boiling water from a kettle. Place on high heat until simmering, then knock down the heat until very low (1 out of 10) and steam for 15-20 minutes. The turmeric will colour the rice. | | Ricotta Gnocchi with Brown Butter & Sage Mar 11th 2016, 05:48, by theunmanlychef 
Gnocchi. It can be a polarizing dish, some folks hate it, some love it. But I would venture to say that most think that it only comes in the potato variety. And I’d have to say those people are 100% WRONG. Potato gnocchi is not the only gnocchi variety around, and it’s certainly not the best. The best variety of gnocchi is hands down, ricotta gnocchi. Ricotta gnocchi is a specialty of Florence that has a light and airy texture with a melt in your mouth consistency. Gnocchi is a centuries old dish that stems back to the Roman times in Italy. The name itself is said to have come from the Italian word nocca for knuckle, gnocchi is essentially a dumpling and it’s insanely popular in Italy. It’s become increasingly popular over in America over the past decade. Ricotta gnocchi most likely predates the potato gnocchi due to the fact that potatoes were introduced into the European diet much later in history. So ricotta gnocchi by default and history is the best. Ricotta gnocchi is simple to make, it’s basically ricotta cheese, eggs, breadcrumbs, and some Parmesan. It acts as a perfect vessel for sauce, you’ll see a few posts in the future for these. The brown butter and sage sauce is a great intro into ricotta gnocchi that will make you fall in love with it. The trick to preparing this gnocchi is, one using good quality gnocchi. I recommend using this brand M. Fierro & Sons, there cheese is literally out of this world. I get mine through Friends and Farms, but you can probably find their product at a authentic Italian grocer. It makes a world of difference. The second thing to remember is that you don’t want to “boil” your gnocchi, it’s just going to fall apart. You want to simmer the gnocchi and be sure to not over cook it. This is a great recipe, I adapted it from Cook’s Illustrated, because duh if you need to learn how to make something for the first time you go to them. 
Recipe – Ricotta Gnocchi with Brown Butter & Sage Sauce Ingredients 16 oz. Whole Milk Ricotta Cheese 2 Slices of Good Quality White Sandwich Bread (1/2 Cup) 1 Large Egg 2 Tablespoons of Fresh Minced Basil 1/4 Teaspoon Ground Black Pepper 6 Tablespoons of Flour 1 /2 Cup Grated Parmesan Sauce 4 Tbsp. Butter 1 Small Shallot 2 Tsp. Minced Sage Leaves 1 Tsp. Lemon Juice Method Step 1 – Strain the ricotta, if you buy good quality Italian ricotta you might not have any liquid. The cheese from Fierro’s doesn’t. If it does, strain it in a fine mesh strainer. Step 2- Transfer to a bowl. Step 3- Pulse bread in a food processor, then spread crumbs on a baking sheet, bake until golden brown. Step 4 – Mix ricotta and breadcrumbs together in a food processor until you have a fine mixture. Step 5 – Transfer to a bowl, then add your eggs, basil, and Parmesan to the ricotta pile. Step 6- Mix together until it’s consistent, then refrigerate for 15 minutes. The dough needs be moist but not so moist that it essentially falls apart in your hands. Step 7 – On a floured surface, portion out the dough into lemon sized pieces. Step 8 – Roll them out 3/4 inch thick ropes and cut them into 3/4 inch lengths. Step 9 – Transfer all the pieces to a piece of parchment paper. Step 10- To prepare the sauce, melt the butter in the pan until it’s browned, be careful not to burn it. The smell of the butter should have a “nutty aroma” to it. Take it off the heat and add your shallots and sage, stir for about a minute. Stir in your lemon juice and allow it to stay warm. Step 11- Prepare your gnocchi, bring a large pot of water to boil. Once it boils reduce the heat so it simmers. Now gently place the gnocchi into the water. The gnocchi is cooked once it floats, about 2 minutes. Step 12- Once the gnocchi’s are cooked scoop them out with a slotted spoon and serve with your sauce. Enjoy!!  
| | Broa de Milho (Portuguese Corn Bread) - Cookbook Countdown Mar 11th 2016, 05:08, by noreply@blogger.com (Zosia) This month, I'm cooking from David Leite's The New Portuguese Table for Cookbook Countdown, an opportunity to cook from a book that has languished on my shelves for far too long but more importantly, a chance to make and eat some great Portuguese food.
I decided to try my hand at Corn Bread, a rustic, everyday Portuguese bread commonly served with soup. Described as "dense, with a thick, crackly crust", it intrigued me most because it was yeast-raised and made with a high proportion of cornmeal.
The recipe was fairly basic and instructions were clear but things did not progress as smoothly as I'd hoped. First, there was the salt. The recipe called for an enormous amount (2 tbsp) that I felt certain was a typo. I used only half but was concerned that it was still too much.Then there was the cornmeal. "Fine" was required. I pulled out the 4 (??) types I had in my pantry - why I have this many, I couldn't say - and settled on the grind that wasn't labelled but was somewhere between the "medium" and "extra fine". It also happened to be a Portuguese brand. My first inkling that all was not well was the cornmeal mush that resulted from mixing it with water rather than the dough I was expecting.
My next clue was the perpetual stickiness of the dough which never cleared the sides of the bowl regardless of the extra flour I added. But I still had hope: the dough was elastic, and the boules had good surface tension, proofed in the allotted time, had good oven spring and developed a crisp crust. And then I sliced into a loaf. The bread was extremely dense, which wouldn't have been an issue if it hadn't also been quite dry. Comparing it to the photo in the book which shows a flatter loaf with a more open crumb, it was clear that the dough should have been much looser and more hydrated than the one I'd made. The extra flour had definitely been a mistake, and I think my "extra-fine" cornmeal might have been the better choice. It had a really nice corn flavour but it was a little too salty for me. It's such an interesting loaf, I'd like to try it again, correcting my errors and reducing the salt even further.
Until then, I had some to deal with: it wasn't good enough to serve with soup as I'd planned but if I've learned anything from my bread baking experience, it's that a failed loaf usually makes excellent croutons.
And the book offers an even better way to repurpose it:More to come on this dish....I'm linking this post to Cookbook Countdown hosted by Kitchen Flavours and Emily's Cooking (Makan2) Foray. | | Sole with Fennel and Orange, and Spinach with Breadcrumbs - Cookbook Countdown Mar 11th 2016, 05:04, by noreply@blogger.com (Zosia) There's nothing like a bit of citrus to brighten up a meal on a dreary winter day. Sea Bass with Fennel and Orange, a simple recipe for pan-fried fish served with a reduction of chicken broth and orange juice, softened slivers of fennel, chopped tomatoes and orange segments was light and bright and did just that. I substituted my family's favourite fish for the sea bass in the recipe, but I think that the sauce, the highlight of this dish, would be wonderful with most white fish.
I wanted an equally simple side dish to complete this easy weeknight meal. I had some Portuguese corn bread in need of repurposing and Spinach with Toasted Bread Crumbs provided the perfect end use for it. Crumbled, dry toasted, then crisped in olive oil, it added a delicious twist to an old standby of garlicky sautéed greens (and the nutmeg was a nice touch too). Both of these terrific recipes are from the book The New Portuguese Table by David Leite, a cookbook I've owned but neglected for some time and have chosen to cook from this month.I'm linking this post to Cookbook Countdown hosted by Kitchen Flavours and Emily's Cooking (Makan2) Foray. | | Summer Fun with Kopparberg Cider Cocktails – Recipes for Swedish Mule and Sgt. Pepper Mar 11th 2016, 05:04, by vanyadhanya Yup, I know I wrote summer. Though ‘autumn’ is in officially, we all know that summer has not truly left us yet letting us enjoy all the backyard barbeques, beaches, short dresses and thongs just a little while longer this year. Apart from doing all this, I got to enjoy my summer a bit more. An exciting project with Social Soup and Kopparberg Cider where I got to don the role of ‘Summer Ambassador’ along with a bunch of other totally cool and fun loving people. Now I am a big cider fan; I love it for its refreshing and fruity flavours. So naturally I was pretty excited when Social Soup got in touch with their latest project – an Instagram based Kopparberg campaign for the release of its two new flavours in Australia. 
Let’s talk a bit about Kopparberg and what makes me so excited about these two new flavours. Kopparberg is a premium Swedish cider that takes its name from the beautiful town Kopparberg in Sweden where it is brewed. What makes this cider extraordinary in flavour is the soft water used along with the fermentation of the fruit. This soft water is exclusive to the region of Kopparberg and has a unique mineral content which draws out the natural flavour of the fruit. Apart from the traditional apple and pear cider (considered to be the best selling in the world), Kopparberg has now launched some interesting flavours like Mixed Fruit, Strawberry and Lime, Naked Apple, Elderflower and Lime etc…. And I am going to talk about Elderflower & Lime and Strawberry & Lime today…. Elderflower and Lime – just wow! Amazing is the word guys; it had the most beautiful sweet flavour of elderflower coming through with just that hint of lime for that citrus burst. As much as I love my pear cider, I have totally fallen head over heels with this one. A clear winner and a must try! With Strawberry and Lime, I had my reservations. But it turned out to be much better than I expected. Usually I find berry flavoured ciders and pre-mixed drinks too sweet and tangy. But this one, inspite of its berrylicious flavour, was more balanced. But it’s the Elderflower and Lime that is the clear winner for me! Kopparberg also shared with us a bunch of cocktail recipes using their latest flavours – simple and interesting drinks that can be made in a jiffy for your cocktail Fridays or for those backyard parties. In fact, it makes a great excuse to invite some friends over, pour out some cocktails, make some great food and chill out. 
So with the long weekend upon us, I decided to share two of my favourite cocktails recipes using both the flavours. Sgt. Pepper The traditional Sgt. Pepper (a cocktail steeped in history) gets a cider twist! A peppery kick to the sweet tangy freshness of the Strawberry & Lime completed with the undertones of vanilla. Finish off with crushed pink peppercorns for that extra spice kick! 

Ingredients: - 200ml Kopparberg Strawberry & Lime
- 5 cucumber rings
- 2 tsp vanilla sugar
- 30ml freshly squeezed lime juice
- 5 crushed black peppercorns
- 3 crushed pink peppercorns (optional), for garnish
- 2 cucumber rings, for garnish
- 1 lime wheel, for garnish
Method: - Add the vanilla sugar, black pepper and lime juice to a tall glass.
- Stir till the sugar has dissolved and then add the cucumber rings.
- Add the ice cubes and top with Kopparberg Strawberry & Lime cider.
- Sprinkle with crushed pink peppercorns and garnish with cucumber rings and lime wheel.
- Enjoy!

Swedish Mule ‘Move over Moscow Mule, the Swedish Mule is here to stay!’ With the freshness and slightly spicy undertones from the ginger, zingy bursts of passionfruit and the sweet refreshing vibrancy of the elderflower and lime, the Swedish Mule is an awesome cocktail and one to be included in your repertoire. 


Ingredients: - 200ml Kopparberg Elderflower & Lime
- 2 inch ginger; finely chopped
- 1 large passion fruit
- 2 lime wheels, for garnish
Method: - Peel the ginger skin and add the finely chopped pieces to a tall glass. Muddle it lightly to release more spice and flavour.
- Scoop out the contents of half of a passion fruit into the glass and mix with the ginger.
- Add ice cubes to the glass and fill with the Kopparberg Elderflower & Lime cider.
- Garnish with the remaining one half of the passion fruit and lime wheels.
And as always…..drink responsibly! 
Disclaimer – This is not a sponsored post but Kopparberg and Social Soup provided me with the cider packs. Tagged: Australia, cider, cocktails, elderflower, flavour, kopparberg, lime, passionfruit, sgt.pepper, social soup, strawberry, swedish, swedish mule, weekend | | Homemade Doughnuts with the Belle! Mar 11th 2016, 05:01, by noreply@blogger.com (Missy Tippens) Missy Tippens
My daughter has been home for spring break this week, and she decided she wanted to make doughnuts that she'd seen posted on a Facebook page called Tasty. (Click here.) So we went for it! Here are the ingredients:
For the doughnuts:
2 1/4 cup (255 grams) cake flour
1 1/2 teaspoons baking powder
1 teaspoon salt
1/2 teaspoon ground nutmeg
1/2 cup sugar
2 tablespoons butter, at room temperature
2 large egg yolks
3/4 cup sour cream (see tip below)
Canola or vegetable oil, for frying
For the glaze:
3 cups powdered sugar, sifted
1 1/2 teaspoons corn syrup
1/2 teaspoon vanilla extract
1/2 cup hot water
Note from Missy: We didn't like this glaze and added a dash of lemon juice to make it taste better to us. I would have started over and just used powdered sugar and milk, but I was out of powdered sugar.
First, my daughter wanted to test a trick she'd seen on YouTube. To separate egg yolks using a water bottle. You break the eggs into a bowl very carefully so you don't break them. And then you suck the yolks into an empty water bottle. :) It worked!

Sift dry ingredients (including nutmeg) together and set aside.Cream the sugar and the butter until fluffy. Then add the egg yolks and mix.
Add half the dry ingredients and mix. Then add sour cream. Mix. Then add the rest of the dry and mix until blended.
Place dough in a greased bowl, cover and refrigerate for an hour (we left ours overnight because it was already 11:30 pm).
Roll out on a floured surface to 1/2 in thickness. Cut in circles (we used a mug). And then cut out the centers.
We didn't have a shot glass for making the holes, so we used a bud vase. LOL
Lightly score three lines on top of each doughnut, forming a triangle. Here's our dough, ready to fry.
Heat the oil to 325 degrees. I didn't have the right type of thermometer so had to guess. Well, I used my meat thermometer to make sure it was at least over 190 degrees. :)
Carefully drop into the oil, scored side up. Once it floats to the top, cook for about 15 more seconds. Flip it over twice more, cooking until lightly golden. (Ours was probably 30-40 more seconds, however I think our oil was a little too hot.)
Drain doughnuts on paper towels. Then dip in the glaze. We decided to also dip some in cinnamon sugar. And on some, even dipped in them glaze and also sprinkled on the cinnamon sugar. We also fried the holes.
I'm not a huge fan of cake doughnuts (give me plain glazed Kristy Kreme, please!), but these were pretty good! My daughter and husband enjoyed them.
If you try this recipe, have fun with it!
www.missytippens.com | | Salsa Cheddar Chicken Mar 11th 2016, 05:00, by noreply@blogger.com (Keith) Maybe I'm on a chicken kick this week..I don't know...but here is another chicken recipe. This is a quick-fix chicken meal that is picky-eater-proof and can fit into your healthy eating plan. Salsa adds a little kick, and zesty dressing brings the tang. INGREDIENTS: 2 Tbsp Zesty Italian Dressing 4 small boneless skinless chicken breasts (1 lb.) 1 large green pepper, cut into thin strips 1 large tomato, chopped 1 cup Chunky Salsa 1 cup 2 percent Milk Shredded Mild Cheddar Cheese 2 cups hot cooked long-grain brown rice DIRECTIONS- Heat dressing in large skillet on medium heat. Add chicken; cover. Cook 4 to 5 min. on each side or until lightly browned. Remove from skillet; cover to keep warm. Add peppers to skillet; cook 5 min., stirring frequently. Stir in tomatoes and salsa. Return chicken to skillet; simmer, covered, on medium-low heat 10 min. or until done (165ºF). Finally- Top with cheese; cook, covered, 4 to 5 min. or until melted. Serve over rice. Enjoy! Eat and drink well my friends! | | Goat Cheese Spinach & Sun-Dried Tomato Quiche. Mar 11th 2016, 05:00, by Sally Goat Cheese Spinach & Sun-Dried Tomato Quiche. EASY, flavorful, delicious quiche using simple flavor-packed ingredients! 
We all need vegetables after a week of this, this, and for heaven’s sake THIS.
Quiche. Make this quiche your St. Patrick’s Day breakfast. Your Easter brunch! Your comforting weekend breakfast at home. This (make-ahead!) goat cheese spinach & sun-dried tomato quiche is the quintessential breakfast dish satisfying even the biggest of appetites. I should know. Kevin’s stomach is usually a bottomless pit. 
What’s even better about this quiche is that it’s pretty. I mean, it’s pretty easy to throw together. Eggs, garlic spinach, milk, and creamy goat cheese with lots of sun-dried tomatoes for savory zest. All poured into a pie crust and baked. Nothing but simple, comforting breakfast food without over-complicating things.
If you’re a pie crust aficionado like yours truly, you’ll want to prepare a homemade pie crust for this quiche. Homemade buttery pastry underneath that savory, flavor-packed filling? Nothing compares! If making homemade pie crust has you running for the hills screaming like a wild banshee (I get it, I’ve been there) then you can certainly use store-bought pie dough. That saves time, too. But I encourage you to try it from scratch. I even have an entire tutorial on making homemade pie crust. Don’t worry, you’ve got this. By the way, you can prepare the homemade pie dough and freeze it saving you as much time as you would buying it from the store. Just sayin’. Me = crazy homemade pie crust lady. 
Alright, let’s talk filling! The possibilities for quiche fillings are endless. Cheesy spinach quiche is my most popular version, so I wanted to stick to similar flavors– only taking it up a notch. I wanted to make this quiche with kale, but I used it all up making a green juice that ended up tasting like salty cardboard. Such a let down. Such a waste of kale. Spinach it was. You can use frozen spinach or fresh. If using fresh, cook it down with a little olive oil and garlic before using. We also have sun-dried tomatoes and we’ll load that filling up with goat cheese. Goat cheese… wonderfully creamy, tangy like cream cheese, sorta makes you feel all sophisticated and fancy. It’s the return of the hot pink skillet. ♥ ↓ 
For the sun-dried tomatoes, use the oil-packed super moist and flavorful ones from a jar. Next to the sad, dry, shriveled ones– there is no competition. Even though you’ll rinse the oil off, the moisture, chewiness, and flavor will stay. 
I understand goat cheese may not be for everyone, so try it with feta cheese instead. Pairs perfectly with those sun-dried tomatoes. You can also use a simple cheddar cheese or something a little more special like grated smoked gouda. Unlike a frittata, quiches are baked to have a rich, creamy, and custard-y consistency. You don’t want it rubbery and eggy. If you prefer a firmer texture, just bake an extra 5 minutes. What makes quiche perfect for brunch– especially if you have guests coming– is that it can be served warm or at room temperature. So you don’t have to be stuck in the kitchen as they arrive. Or as the kids open their Easter baskets! I like to be completely honest on my blog, so I must tell you that Jude has an Easter basket. What is my deal. 
Serve the quiche with anything! Fruit salad, regular salad, easy cinnamon rolls, sautéed potatoes, lemon poppy seed muffins, bacon, sausage, ham, blueberry streusel muffins, CHAMPAGNE, the sky’s the limit. PS: I got the pie dish for our wedding. Isn’t it gorgeous? It’s by Juliska and their berry & thread line. Goat Cheese Spinach & Sun-Dried Tomato Quiche Yield: one 9-inch quiche Prep Time: 30 minutes Total Time: 1 hour, 15 minutes  Print Recipe Make an easy and delicious goat cheese spinach & sun-dried tomato quiche for breakfast or brunch using fresh spinach and flavor-packed ingredients. Makes excellent leftovers for lunch or dinner, too! Directions: - Prepare the pie crust the night before to save yourself some time.
- Preheat oven to 350°F (177°C).
- Heat olive oil and garlic in a skillet over medium heat. Add the spinach. Cook and stir until wilted. Set aside.
- On a floured work surface, roll out the chilled pie dough. Turn the pie crust dough about a quarter turn after every few rolls until you have a circle 12 inches in diameter. Carefully place the dough into a 9-inch pie dish. Tuck it in with your fingers, making sure it is smooth. With a small and sharp knife, trim the extra overhang of crust and discard. Using pie weights, pre-bake the pie crust for 8 minutes.
- While the pie crust is baking, whisk the eggs and milk together until combined. Stir in the sun-dried tomatoes, goat cheese, and spinach. Sprinkle with salt and pepper.
- After 8 minutes, remove the pie crust from the oven. Pour in the egg mixture. If desired, sprinkle the top lightly with more salt and pepper.
- Bake the quiche until it is golden brown on top and the center is no longer jiggly. Depending on your oven, this will take anywhere between 45 - 55 minutes. Use a pie shield to prevent the pie crust from over browning, if desired. Allow to cool for 5 minutes before slicing and serving. This quiche makes great leftovers for breakfast, lunch, or dinner! Store tightly covered in the refrigerator for up to 4 days.
- Make ahead tip: Baked quiche freezes very well, up to 2 months. Thaw overnight and bake at 350°F (177°C) to warm up for 25 minutes, give or take.
© Sally’s Baking Addiction. All images & content are copyright protected. Please do not use my images without prior permission. If you want to republish this recipe, please re-write the recipe in your own words, or link back to this post for the recipe. On the sweeter side of things, I have a baked cream cheese french toast casserole you need to try for upcoming brunch celebrations. This is all prepared the night ahead of time! Sweet cream cheese stuffed inside. 
More savory breakfast recipe ideas for you! Eggland’s Best provided me with eggs to bring you this recipe. | | Desserts at The Taj Falaknuma Palace Mar 11th 2016, 04:32, by Puliyogare Travels 
This is in continuation to our royal meal experience at The Taj Falaknuma Palace. In case you missed what you must eat for appetizers and main course, do read it right here: For desserts, we were served: Zauq-E-Shahi: A dessert platter that blends tradition with contemporary aesthetics. A beautifully presented tasting plate of traditional Hyderabad favourites. Double Ka Meeta: Almost like the English bread pudding, made with fried bread slices which are then soaked in hot milk infused with spices that include saffron, cardamom and slow cooked over fire, this dessert screams Hyderabad. Kubani Ka Meeta: Apricots widely used in Middle Eastern cooking, founds their way into Hyderabad cooking through this popular dessert. Made with dried apricots that are stewed and combined with sugar and dry fruits, this is served with a dollop of fresh cream or ice cream. Pineapple & Banana Halwa: This particular recipe has been handed down from the Nizam’s family says Chef. Nair. The Halwa is made of Pineapples and Bananas that are ground and slow cooked with sugar and ghee. The end result is a beautiful yellow which is so flavourful that you feel you are right in the middle of a tropical forest. Sheer Korma: Vermicelli is slow cooked in milk with dry fruits and sugar and served. A dessert mostly prepared by the Muslims during Eid ul-Fitr and Eid al-Adha in Afghanistan, India, Pakistan, Bangladesh and parts of Central Asia. Beetroot Halwa: Chef.Nair’s proudly says that they’ve pushed the boundaries of their imagination and tried making halwas out of the most unusual ingredients including green chilies, spinach and beetroot. On the day we were there, we got to try the beetroot halwa. While the flavor of beetroot was a little overpowering, this is still a unique twist to the Halwa that deserves a shot.  Malai Kulfi with Falooda: A street special dessert from Charminar, this won hands down. Full cream milk combined with heavy cream, nuts, cardamom and saffron is boiled and put in molds and frozen to make the malai kulfi. The dessert is beautifully crafted such that the kulfi rests on a bed of cooked vermicelli (in saffron water), with a smattering of tukmaria seeds or basil seeds, rose water, thandaai, and malai rabri and garnished with brandy snaps. Tasting each component individually, somehow did not deliver the punch. Once I took in a mouthful of all the elements together, the dessert’s true essence emerged and kept me wanting for more. Malai Kulfi with Falooda: A street special dessert from Charminar, this won hands down. Full cream milk combined with heavy cream, nuts, cardamom and saffron is boiled and put in molds and frozen to make the malai kulfi. The dessert is beautifully crafted such that the kulfi rests on a bed of cooked vermicelli (in saffron water), with a smattering of tukmaria seeds or basil seeds, rose water, thandaai, and malai rabri and garnished with brandy snaps. Tasting each component individually, somehow did not deliver the punch. Once I took in a mouthful of all the elements together, the dessert’s true essence emerged and kept me wanting for more.
A fabulous meal experience overall and one gets a true sense of what it is to dine the Nizami way! | | Quick & Easy Methi Chicken Recipe | Methi Chicken Mar 11th 2016, 04:30, by noreply@blogger.com (Shanaz Rafiq)
It happens most of the time that, I need to cook up something in very less time. It could be some unexpected guest or whatever be the reason. So I always do some preparation and keep ready for my last minute rescue.
Preparations can be a homemade ginger & garlic paste, or picked and sorted out methi leaves (fresh fenugreek leaves). And even fried onion are great life savers....I mean time savers...both ways it is the same.
What's the thing with fried onion! Well, when I have some free time, or if I see lots of onion lying in the the basket, I take about 5 large onions, peel them, slice them (not very fine) and I simply deep fry them (till light golden). Place it on an absorbing paper and just put them in a container....and goes right in to the refrigerator. Sounds like too much work...but only when you are doing it.
Next time, when you actually do not have time to stand and patiently wait for those onions to turn into the color you want, just throw in some pre-fried onions into your gravy.
This dish is exactly all about that. Fried onion can be optional, if you have it....will really add to the taste. If you don't have..it is perfectly fine, but that should not stop you from trying out this recipe.
In case if you are on a diet, you can even skip the cream part of the recipe. The dish will taste equally good.
Serves: 4Preparation Time: 30 minutescooking time: 30 to 40 minutes.Total: 1 hour approx
Recipe SummaryIngredients:- 800 gms chicken (cut into small size pieces)
- 2 cups of Methi leaves (discard the stem)
- 1/2 cup cream (optional)
- 3/4 cup fried onion. (made with 2 large onion)
- 1/2 cup chopped coriander leaves
- 5 tbsp of cooking oil / ghee
For Marinade: - 3 tbsp of yogurt
- 1 tbsp ginger & garlic paste
- 1 tbsp red chili powder (as per taste)
- Pinch of turmeric
- 2 tsp cumin powder
- 2 tsp coriander powder
- 1/4 tsp garam masala powder
- 1 tbsp lemon juice
- Salt to taste
Preparation: - Clean and cut the chicken.
- Prepare the marinade.
- Pick and wash methi leaves.
- Make fried onion.
Method:
1) Clean the chicken and mix all the ingredients in a large bowl. Marinate chicken pieces in it for about 30 minutes (1 or 2 hours is also fine). 2) Heat 5 tbsp of oil in a thick bottom non-stick pan. Add marinated chicken and fry for 2 minutes on high heat. 3) Turn the flame on low and cook the chicken covered till almost done. (This will take about 15 to 20 minutes) 4) After 15 minutes of cooking the chicken, add chopped methi leaves and stir well. Cook for 5 to 10 minutes more and add 1/2 cup cream and 3/4 cup fried onion. Stir well and cook for another 5 minutes.5) Add chopped coriander leaves, taste and adjust the seasoning and serve hot with roti or naan. If you wish to have it with rice then you can add some water and adjust the consistency accordingly.
Step by step method1) Clean the chicken and mix all the ingredients in a large bowl. Marinate chicken pieces in it for about 30 minutes (1 or 2 hours is also fine). 2) Heat 5 tbsp of oil in a thick bottom non-stick pan. Add marinated chicken and fry for 2 minutes on high heat.
3) Turn the flame on low and cook the chicken covered till almost done. (This will take about 15 to 20 minutes)4) After 15 minutes of cooking the chicken, add chopped methi leaves and stir well. Cook for 5 to 10 minutes more and add 1/2 cup cream and 3/4 cup fried onion. Stir well and cook for another 5 minutes.
5) Add chopped coriander leaves, taste and adjust the seasoning and serve hot with roti or naan. If you wish to have it with rice then you can add some water and adjust the consistency accordingly. | | Coupes & Caviar Menu for Jenn's 43rd Mar 11th 2016, 04:15, by noreply@blogger.com (Camilla Mann) In January, at Brian's Bacon Bash, we were talking about wine trivia and I was inspired to create a menu around this theme: coupes. So I tracked down some crystal coupes - thanks, Nonna! - and to celebrate the next birthday in our group, this is what I'm serving...
Recipes and tasting notes will be linked up later. Excited... | | Thai Young Coconut Drink Mar 11th 2016, 04:08, by Tes Summer is approaching. In a way, it’s already here because of Global Warming it seems. But school summer vacation is on the way. Yaseen is going to have 2 months long vacation where we will probably do the best out of it. Summer in India is harsh, especially in a place where we live. It’s very dry and dusty here. The temperature during the day can goes up to 44 degree, and the bright sunlight will melt off any sunscreen that you layer on your skin. Summer is my least favorite season. I always wonder why they don’t put school vacation in rainy season or winter. To me, that’s more practical because in rainy season you shouldn’t be traveling to school anyway, and in winter, the weather here is just perfect to be outdoor. Anyway, if you guys know the logic of making summer a long school vacation for kids, please let me know  
Though summer is my least favorite season, I love that I get to spend a lot of time with Yaseen. We will have a lot of outdoor activities despite the boiling temperature outside. And cooling summer drinks and desserts can make the hot weather bearable, not to mention all the juicy mangoes and other summer fruits that are going to hit the markets. 
When I think of summer, I think of young coconut. Chilling coconut water is the best. It is very refreshing, filled with essential minerals and nutrients. Coconut water is such a summer thing, and we drink a lot of it in summer. 
I have a coconut deliver at my door every morning. Usually I drink it after gym, but on the day that I don’t exercise, I give it to the boys or make something with it. And here is my favorite summer drink made with fresh young coconut. It’s so good, sweet and fragrant. Young Coconut Water is very popular drink in Thailand. You will see something like this selling on the side of the roads all years round. I always get one glass when I visit fresh markets. You will be surprised that it is very easy to make. 
This recipe really enhances the beautiful flavor of coconut. Sometimes, I make a lot of this delightful coconut water drink and keep it in the fridge for the boys. It can be stored like that for a few days. I hope you like it, and here’s the recipe. Thai Young Coconut Drink Ingredients: (For 3-4 Servings) 
1 fresh young coconut 500 ml water ½ cup sugar A pinch of salt 2 fresh pandan leaves Ice cubes for servings Direction: - In a medium pot, bring water to boil.
- Add pandan leaves and sugar. Stir until the sugar is dissolved.
- Add a pinch of salt.
- Carefully cut the top of the coconut and pour coconut water into the pot. Stir and turn off the heat.
- Use a spoon to scoop coconut meat out of the shells and add it into sweet coconut water.
- Keep aside and let the coconut water cool down completely. The coconut water will be sweet and fragrant, and it should be a little murky because of the tender coconut meats swimming inside.
- Serve chill with lots of ice.

Love,
Tes | | Vellutata di cavolfiore (Cream of Cauliflower Soup) Mar 11th 2016, 04:01, by Frank Here’s a dish that’s perfect for a spur of the moment meal, but is so beautiful and refined it could also serve as the starter for an elegant dinner: Vellutata di cavolfiore, or Cream of Cauliflower Soup. A vellutata—like its twin the crema, see the Notes below—can be roughly translated in English as a “Cream of X” Soup, but the cream isn’t really the main point. Rather it’s the smooth and velvety texture that defines this category of dishes. (Velluto means ‘velvet’ in Italian.) This basic recipe is truly quick and easy. The cauliflower, along with some potato, simmers in a typical flavor base of sautéed onion or leek, topped up with water and broth. Once tender, you purée everything in a blender until perfectly smooth, and finish off the dish with a cream or egg yolk liaison. You should be done in less than 30 minutes. And once you’ve mastered this simple basic recipe, you can use the same technique to make a vellutata out of just about any vegetable. Ingredients Serves 4-6 - 1 medium head of cauliflower, trimmed, cored and roughly chopped
- 1 russet or other baking potato, peeled and chopped into cubes
- 1 medium onion, peeled and sliced, or 1 leek, only the white part, sliced into rounds
- Olive oil and/or butter, q.b.
- Water or broth, q.b.
- 100ml (1/2 cup) heavy cream
- Salt and pepper
- 1oog (3-1/2 oz) grated Parmesan cheese (optional)
For toppings: - Minced chives
- Minced fresh parsley
- A drizzled of olive oil
- Freshly ground pepper
- Fleur de sel
Directions As with so many Italian dishes, begin by making a flavor base, called a soffritto in Italian, by gently sautéing the onion or leek in olive oil and butter in a large saucepan until wilted, taking care to avoid browning. Add the potato and cauliflower pieces, turning everything over to cover them in the soffritto. Let everything simmer together, turning from time to time, for a minute or two. Add enough water or broth to just cover the vegetables. Cover and let simmer until the vegetables are perfectly soft, about 15 minutes. Transfer the vegetables and their cooking liquid to a blender, along with the cream (and grated cheese, if using). Let the blender run until the mixture has turned into a perfectly smooth purée. Return the purée to the saucepan. Check for thickness. If too thick, add more liquid, which could be more water, broth or cream as you prefer. If too thin, let the purée reduce over a gentle simmer. Check and adjust for seasoning as well. When you’re ready to serve, bring the purée just to the simmer over gentle heat. Serve with one or more of the suggested toppings and, if you like, slices of toasted bread. Notes on Vellutata di cavolfiore The terms vellutata and crema are often used more or less interchangeably, as they both refer to soups of puréed vegetable, but I’ve read various sources that draw a distinction: A vellutata is thickened by adding a cream or egg yolk liaison at the end, while the crema is thickened by using a roux. But others sources like this one say that it is a vellutata is the one that begins with a roux—which actually makes sense, since salsa vellutata is a way to say béchamel sauce in Italian. And, to complicate things a bit further, there’s also the passato, which refers to your basic vegetable purée, but which can be enriched with cream. I’ll let the experts fight this one out, whatever you call this kind of soup, it’s delicious. As mentioned, there’s a whole range of vellutate you can make in the very same way with other vegetables according to the season. I love cauliflower in the cold winter months, but pumpkin or beans are equally welcome in the Fall or Winter, asparagus in the Spring, zucchini in the Summer, etc. And you can make your vegetable purée a bit thicker to use it not as a soup on it own, but as a dressing for pasta. I like to add potato whenever I feel I need an especially smooth texture, but it’s optional; many vegetables are perfectly fine on their own. And if you want to make your soup extra rich, whisk an egg yolk into your cream before adding it at the end; bring the soup just barely to the simmer before serving. And by the way, there no need to throw away the green part of the leeks: it can be used for broth, along with other vegetable scraps. Ingredients - 1 medium head of cauliflower, trimmed, cored and roughly chopped
- 1 russet or other baking potato, peeled and chopped into cubes
- 1 medium onion, peeled and sliced, or 1 leek, only the white part, sliced into rounds
- Olive oil
- Butter
- Water or broth, q.b.
- 100ml (1/2 cup) heavy cream
- Salt and pepper
- 1oog (3-1/2 oz) grated Parmesan cheese (optional)
-
- Minced chives
- Minced fresh parsley
- A drizzle of olive oil
- Freshly ground pepper
- Fleur de sel
Instructions - As with so many Italian dishes, begin by making a flavor base, called a soffritto in Italian, by gently sautéing the onion or leek in olive oil and butter in a large saucepan until wilted, taking care to avoid browning.
- Add the potato and cauliflower pieces, turning everything over to cover them in the soffritto. Let everything simmer together, turning from time to time, for a minute or two.
- Add enough water or broth to just cover the vegetables. Cover and let simmer until the vegetables are perfectly soft, about 15 minutes.
- Transfer the vegetables and their cooking liquid to a blender, along with the cream (and grated cheese, if using). Let the blender run until the mixture has turned into a perfectly smooth purée.
- Return the purée to the saucepan. Check for thickness. If too thick, add more liquid, which could be more water, broth or cream as you prefer. If too thin, let the purée reduce over a gentle simmer. Check and adjust for seasoning as well.
- When you're ready to serve, bring the purée just to the simmer over gentle heat. Serve with one or more of the suggested toppings and, if you like, slices of toasted bread.
http://memoriediangelina.com/2016/03/11/vellutata-di-cavolfiore/  | | The Stargarita: A Tropical Starfruit Margarita Recipe Mar 11th 2016, 04:00, by noreply@blogger.com (Andrea Duclos) *This post is sponsored by Patrón Tequila You guys know we grow a lot of tropical fruit in our garden--- starfruit being one of them! Personally, I find starfruit to be more of a novelty fruit--- more than a snack, it's mostly just really pretty to look at. But it does taste absolutely great in beverages too (so refreshing!). Starfruit lemonade is already a treat around here when we have an abundance of starfruit--- but what about cocktails?! This really only makes sense, right?! You guys know we grow a lot of tropical fruit in our garden--- starfruit being one of them! Personally, I find starfruit to be more of a novelty fruit--- more than a snack, it's mostly just really pretty to look at. But it does taste absolutely great in beverages too (so refreshing!). Starfruit lemonade is already a treat around here when we have an abundance of starfruit--- but what about cocktails?! This really only makes sense, right?! Well, Patrón Tequila is having a competition-- a search for 2016's Margarita of the Year. Seven completely unique margaritas made by seven unique bartenders. So which one did I personally choose for the margarita of the year? Well, the tropical starfruit one made by Bettina Barnoczki from Miami Florida of course. I mean, duh. It's how I like my cocktails to be--- light, refreshing, slightly tart and fruity-- but it doesn't taste like you stuck your head in a bowl of punch. Just something you want to sip on in a cool warm breeze under banana trees. Probably in a hammock too. Sounds amazing right? Well, Patrón Tequila is having a competition-- a search for 2016's Margarita of the Year. Seven completely unique margaritas made by seven unique bartenders. So which one did I personally choose for the margarita of the year? Well, the tropical starfruit one made by Bettina Barnoczki from Miami Florida of course. I mean, duh. It's how I like my cocktails to be--- light, refreshing, slightly tart and fruity-- but it doesn't taste like you stuck your head in a bowl of punch. Just something you want to sip on in a cool warm breeze under banana trees. Probably in a hammock too. Sounds amazing right?
You can cast your vote for the 2016's Margarita of the year HERE.  INGREDIENTS INGREDIENTS1.5 oz Patrón Silver Infused with Mint Tea*
.5 oz Patrón Citrónge Mango
.5 oz Fresh Lime Juice
METHOD
Combine all ingredients in a cocktail shaker and shake with ice to chill. Strain over fresh ice into a salt- rimmed Collins glass. Garnish with a slice of star fruit and a lime wheel.
*Patrón Silver Infused with Mint Tea:    Have a wonderful Friday, friends! Make this cocktail and celebrate for me, K? Have a wonderful Friday, friends! Make this cocktail and celebrate for me, K?
pps. want to watch a video and see how the cocktail is made? That helps right! Here's a video Of Bettina in Miami and her Stargarita! Cheers, friends!
 Cast your vote for which you think makes a #PerfectMargarita and is worthy of being named 2016’s Margarita of the Year. Cast your vote for which you think makes a #PerfectMargarita and is worthy of being named 2016’s Margarita of the Year. | | Pan Roasted Chops & Cabbage Mar 11th 2016, 04:00, by noreply@blogger.com (Marie Rayner) 
Well, here we are. It's the end of the week and I find myself looking through the refrigerator to find all of the bits and pieces and trying to make a silk purse out of a sow's ear. Not that I mind really . . . I quite like the challenge of looking in the refrigerator and seeing what I can come up with. It makes things more exciting. I suppose my experience in years and years of cooking helps me a lot in that way . . . that and my love of all things culinary, because it means that I have a natural aptitude for knowing just what flavours go with what.

Today I found a package of 3 pork loin chops, some rashers of streaky smoked bacon, half a cabbage, half a small bottle of apple juice, half a jar of apple sauce, and a tired looking carrot. I always have onions and potatoes in the larder. Although there were only three loin chops in the pack, but they were rather thick and so I figured I could feed four people (two adults and two children) with this, adding some mash on the side.

I cooked the bacon and then crumbled it, setting it aside. I could have browned the chops in the drippings, but there weren't many and so I added a tsp each of butter and olive oil, seasoned my chops really well with salt and pepper and thyme and then browned them off.

I then added an onion and the carrot (cut into half moons each) to the pan drippings and started softening them. Once I got them really started I began to add the cabbage in handfuls along with a bit of apple juice, letting it wilt down a bit before I added more. The cabbage was thinly shredded by hand, not too thin, but not too thick either.

Once I had all the cabbage in, I stirred in the apple sauce, apple juice, half of the crumbled bacon and gave it a good stir. Some apple cider vinegar was also added to counteract the sweetness of the applesauce. I nestled the partially cooked chops down into the mixture, covered it tightly and then let them simmer for a bit, with the end result being some really tender and juicy chops, in a flavourful vegetable sauce mixture that went down a real treat with a pile of mash on the side.

I love it when that happens. They do say waste not want not! And when you can make the bits left in the refrigerator taste as special as this did, you just know you have done a great job! I think I could have added a bay leaf for even more flavours, but will save that now for next time. We both really enjoyed! The Toddster does love his chops!

*Pan Roasted Chops and Cabbage* Serves 4
A little something I threw together to use up what I had in the refrigerator. Delicious!
4 boneless pork loin chops 1 tsp butter 1 tsp olive oil salt, pepper and dried thyme 6 rashers of streaky bacon, cooked and crumbled 1 medium onion, peeled and thinly sliced into half moons 1/2 medium head of cabbage, thinly sliced 1 large carrot, peeled and cut into thin half moons 2 heaped dessert spoons apple sauce 1 TBS cider vinegar 6 fluid ounces of cloudy apple juice (3/4 cup)  Melt the butter together with the olive oil in a large skillet which has a lid. Season the chops all over with salt and pepper and sprinkle with thyme. Brown them well on all sides in the butter/olive oil mixture. Remove to a plate and keep warm. Add the onions and carrots to the pan. Cook, stirring occasionally, until the onion softens. Add the Cabbage a handful at a time, along with a bit of the apple juice, adding more cabbage as it wilts down. Add the remaining apple juice, the apple sauce and the vinegar. Tuck the chops in amoungst the cabbage mixture. Cover tightly and cook for about 15 to 20 minutes, until the pork is cooked through and the flavours have nicely melded. Sprinkle with the crumbled bacon. Serve each chop with some of the cabbage mixture. I served this with creamy mashed potatoes.  Bon Appetit! | | Brazilian Rabbit Mar 11th 2016, 03:46, by noreply@blogger.com (Sara) A friend once shared a recipe for Brazilian chicken with me, but Anthony and I don't really buy chicken in the US. We did find frozen rabbit in the grocery store, though, so we couldn't resist buying it and decided to put it to use in this recipe.
The recipe calls for the following ingredients: 1 lb. skinless, boneless, chicken, cubed (we substituted rabbit for the chicken) ¼ cup olive oil 4 garlic cloves, minced 1 cup water ½ cup orange juice 1 cup chopped cilantro leaves 1 cup yellow seasoned rice mix (from 8 oz box)
Sprinkle rabbit with salt and pepper. Heat oil on medium high heat. Add chicken and garlic, sauté until the meat is browned, about 3 minutes. Add water and orange juice. Bring to a boil and mix in rice and seasoning. Once this has returned to a boil, reduce heat to medium low, cover, and cook until liquid is absorbed and rice is tender, about 20 minutes. Remove from heat, let stand covered 10 minutes, and stir in cilantro.
The dish tasted just right and everyone was surprised at how much the rabbit tasted like and had the same texture as chicken. I'm sure no one would have known if we hadn't told them... | | Creamy Cashew-Garlic Alfredo Mar 11th 2016, 03:37, by noreply@blogger.com (Tofu Mom (AKA Tofu-n-Sprouts))  This is one of the first successful vegan recipes I "wrote", years ago when I was first struggling into veganism, It was a hit then, and it's still my family's first choice when I ask them what they want for dinner. This is one of the first successful vegan recipes I "wrote", years ago when I was first struggling into veganism, It was a hit then, and it's still my family's first choice when I ask them what they want for dinner.
All my non-vegan friends love this recipe as well, and I'm pretty sure most of them don't even realize it's vegan. Some of them have been known to call me in the middle of the night, begging me to bring some to work the next day.
The sauce is great because it's simple, you probably have the ingredients in your pantry, and it was written to work in your average Target-variety food processor; that's how I've always made it.
However, I recently got a Vita-Mix and I have to tell you, *WOW* it's quite lovely for sauces like this too! I do have to double or triple the sauce to make it mix well in the larger Vita-Mix container. Not a problem...We've been enjoying a LOT of Alfredo lately!!
Use whatever machine you have, it will be delicious...
Cashew Garlic Alfredo Sauce 1/2 cup raw cashews (not roasted)
1-2 tsp. fresh lemon juice (I don't measure, just a good squeeze)
1 1/2 cups boiling water
2 cloves garlic, crushed (or more to taste)
1 Tbsp. extra-virgin olive oil
2 Tb. nutritional yeast (optional)
- Pulverize raw cashews in the food processor until very fine but do NO turn them into cashew butter.
- Add 1 1/2 cups boiling water. (*The BEST way to do this, is to make the sauce while the pasta cooks - scoop out 1 1/2 cups of lightly salted pasta-cooking water and use it - the starch from the pasta-cooking water thickens the sauce PERFECTLY!)
- Add water to cashews and process until smooth... this will take several minutes.
- Add nutritional yeast (optional - I love it, but my kids prefer it without), garlic cloves, olive oil and squeeze of lemon juice.Process again until smooth, another couple minutes, it'll start to thicken a bit!
- Taste and adjust seasonings, adding more lemon, salt, pepper or garlic to your tastes. Makes a decadently creamy sauce! Serve over hot pasta, rice, potatoes, whatever!
This stuff is wonderfully simple and tastes SO very good. I often add sauteed mushrooms, chives, chopped olives or sundried tomatoes, depending on my mood. | | GUTTI VANKAYA CURRY Mar 11th 2016, 03:12, by noreply@blogger.com (Sirisha) GUTTI VANKAYA CURRY Ingredients:
Brinjals(eggplant)-1 lb
Onion(paste)-2
Ginger garlic paste-1 tablespoon
Coriander powder-1 tablespoon
Cumin powder-1/2 teaspoon
Chili powder-1 tablespoon
Turmeric powder-1/4 teaspoon
Salt-as per taste
Oil-2 tablespoon
Garam masala-1/2 teaspoon
Coconut milk-1/2 cup
Coriander leaves-for garnish Preparation:
In a bowl mix onion paste,ginger garlic paste,coriander powder,cumin powder,turmeric,chili powder,salt and stuff this mixture in to brinjals.
Add oil in a pan and add stuffed brinjals in to it.close the lid and let it cook for 10 mins.
Now add water(1cup) and cook for 5 mins in medium flame.Then add coconut milk,garam masala and cook until the oil oozes out.Garnish with coriander leaves Enjoy cooking | | MENTHI KURA PAPPU(DRY) Mar 11th 2016, 03:10, by noreply@blogger.com (Sirisha) MENTHI KURA PAPPU(dry) Ingredients:
Toor dal( kandi pappu)-1 cup
Menthi leaves(washed)-1 big bunch
Water-2 cups
Turmeric powder-1/2 teaspoon
Chili powder-1 teaspoon
Green chilies-2
Salt-as per taste
Oil-1 tablespoon
Garlic- 5 cloves
Red chilies-2
Urad dal-1 teaspoon
Cumin seeds-1 /2 teaspoon
Mustard seeds-1/2 teaspoon
Curry leaves Preparation:
Add toor dal(washed),menthi leaves,green chilies ,water in a pan and cook until the dal is completely cooked.
Add salt,turmeric,chili powder and cook for 2 mins.switch off the flame.
Now add oil in another pan. add crushed garlic,urad dal, cumin seeds,mustard seeds,red chilies,curry leaves. fry them for 1 min and add this tempering to dal mixture. Enjoy cooking | | MANGO AND PRAWNS CURRY Mar 11th 2016, 03:07, by noreply@blogger.com (Sirisha) MANGO AND PRAWNS CURRY Ingredients:
Mango(big)-1
Prawns-1/4 kg
Onion(chopped)-1
Turmeric powder-1/2 teaspoon
Chili powder-1 teaspoon
Green chilies-3
Oil-2 tablespoons
Salt-as per taste
Coriander leaves- for garnish Preparation:
Add oil in a pan,add chopped onions, green chilies and fry them for 2 mins.
Add turmeric,chili powder,salt ,
Prawns and fry them for 5 mins.
Now add mango pieces ,water (1 1/2 cup) and let it cook until the water evaporates.
Garnish with coriander leaves. Enjoy cooking | | CHICKEN PAKODI Mar 11th 2016, 03:04, by noreply@blogger.com (Sirisha) CHICKEN PAKODI Ingredients:
Chicken-2 lbs
Ginger garlic paste-1 tablespoon
Coriander powder-1 tablespoon
Cumin powder-1/2 teaspoon
Turmeric powder-1/4 teaspoon
Chili powder-1 tablespoon
Garam masala-1 teaspoon
Lemon juice-1 tablespoon
Besan( chana dal powder)-1 cup
Salt-as per taste
Oil- for deep frying
Green chilies-2
Curry leaves
Coriander leaves- for garnish Preparation:
Marinate chicken with all the ingredients above except oil and coriander leaves for at least 10 mins.
Now heat oil in a pan and deep fry the chicken pieces until golden brown in colour.
Garnish with coriander leaves. Enjoy cooking | | NAN KHATAI Mar 11th 2016, 03:02, by noreply@blogger.com (Sirisha) NAN KHATAI Ingredients:
Maida-1 1/2 cup
Unsalted butter(at room temperature)-3/4 cup
Sugar( powdered)-3/4 cup
Baking powder-1/4 teaspoon
Salt-1/4 teaspoon
Cardamom powder-1/4 teaspoon
Roasted cashews-for garnish Preparation:
Add butter and powdered sugar in a bowl,mix it well it should look like cream.
Now add maida,baking powder,salt,cardamom powder
and mix it in to a dough.make equal sized balls out of dough and keep in it a baking tray. Garnish with roasted cashews.
Bake it at 375 F for 15 to 20 mins. Enjoy cooking | | BREAD HALWA Mar 11th 2016, 03:00, by noreply@blogger.com (Sirisha) BREAD HALWA Ingredients:
Bread slices-7
Ghee-1/2 cup
Milk-2 cups
Sugar-1 cup
Almonds-for garnish
Cashews- for garnish
Cardamom-3( powder) Preparation:
Cut the bread slices in to small pieces. Add ghee in a pan then add bread pieces and roast it in medium flame until golden brown.
Add milk to it and cook for 10 mins. Stir occasionally to get the mixture soft.
Add sugar and stir until ghee comes out.sprinkle cardamom powder and garnish with roasted cashews and almonds. Enjoy cooking | | ANAPAKAYA TOMATO ROTI PACHADI Mar 11th 2016, 02:58, by noreply@blogger.com (Sirisha) ANAPAKAYA TOMATO ROTI PACHADI Ingredients:
Anapakaya(sorakaya)-1(small)
Tomatoes-3
Tamarind-small piece
Green chilies-4
Salt-as per taste
Coriander seeds-1 teaspoon
Urad dal-1 teaspoon
Chana dal-1 teaspoon
Cumin seeds-1/4 teaspoon
Mustard seeds-1/4 teaspoon
Oil-1 tablespoon
Dried red chili-1
Hing-1 pinch
Curry leaves Preparation:
Add 1 tablespoon of oil in a pan and add urad dal, coriander seeds,green chilies,tamarind. fry them for 2 mins.
In the same pan add anapakaya pieces, close the lid and cook for 5 mins.Now add chopped tomatoes,salt and cook for 10 mins.let this mixture cool and grind coarsely.
Add oil in another pan and add chana dal,cumin seeds,mustard seeds,dried red chilies,curry leaves and hing for tempering. Enjoy cooking | | TOMATO RASAM Mar 11th 2016, 02:54, by noreply@blogger.com (Sirisha) TOMATO RASAM
Ingredients:
Tomatoes-3
Tamarind paste-1 teaspoon
Turmeric powder-1/4 teaspoon
Salt-as per taste
Green chili-1
Coriander leaves- for garnish
Oil-1 tablespoon
Rasam powder (mtr)-1 tablespoon
Cumin seeds-1/4 teaspoon
Mustard seeds-1/4 teaspoon
Curry leaves Preparation:
Add oil in a pan and add cumin seeds,mustard seeds,green chili and curry leaves. Then add chopped tomatoes and cook for 5 mins.
Now add turmeric,rasam powder, tamarind paste,salt and cook for 2 mins.
Add water( 5 cups) and let it boil for 10 mins.garnish with coriander leaves. Enjoy cooking | | FISH FRY Mar 11th 2016, 02:52, by noreply@blogger.com (Sirisha) FISH FRY
Ingredients:
Fish-2 lbs
Ginger garlic paste-1 tablespoon
Coriander powder-1 tablespoon
Cumin powder-1/2 teaspoon
Chili powder-1 tablespoon
Turmeric powder-1/4 teaspoon
Salt-as per taste
Garam masala-1 teaspoon
Corn flour-2 tablespoon
Lemon juice-1 tablespoon
Oil-for deep frying Preparation:
Marinate fish pieces with all the ingredients above except oil for 30 mins.
Add oil in a pan and fry the marinated fish pieces till golden colour in medium flame. Enjoy cooking | | CHIKKUDUKAYA TOMATO CURRY Mar 11th 2016, 02:50, by noreply@blogger.com (Sirisha) CHIKKUDUKAYA TOMATO CURRY
Ingredients:
Chikkudukayalu-1/4 kg
Tomatoes-1/4 kg
Turmeric powder-1/4 teaspoon
Chili powder-1 teaspoon
Salt-as per taste
Oil-2 tablespoon
Onion-1 (chopped) Preparation :
Add oil in a pan and fry chopped onions for 5 mins. Then add turmeric and chikkudukayalu pieces,close the lid and fry them for 10 mins.
Add chopped tomatoes fry them for 5 mins.Now add chili powder,salt and water(1 cup) let it cook till the water evaporates. Enjoy cooking | | TANDOORI CHICKEN Mar 11th 2016, 02:47, by noreply@blogger.com (Sirisha) TANDOORI CHICKEN
Ingredients:
Whole chicken-1
Ginger garlic paste-1 tablespoon
Coriander powder-1 tablespoon
Cumin powder-1/2 teaspoon
Turmeric powder-1/4 teaspoon
Salt-as per taste
Chili powder-1 tablespoon
Lemon juice-2 tablespoon
Curd-1 cup
Tandoori masala-2 tablespoon
Oil-2 tablespoon
Red food colour (optional) Preparation:
Marinate chicken with all the ingredients above except oil for at least 3 to 4 hours.
Preheat the oven at 450 F.Now apply oil to the chicken and keep it in the oven.After 20 mins turn the chicken and keep it for another 20 mins until chicken is done. Enjoy cooking | | FISH CURRY Mar 11th 2016, 02:44, by noreply@blogger.com (Sirisha) FISH CURRY
Ingredients:
Fish-2lbs
Onion( paste)-2
Green chilies-2
Ginger garlic-1 tablespoon
Coriander powder-1 tablespoon
Cumin powder-1/2 teaspoon
Turmeric powder-1/4 teaspoon
Chili powder-1 tablespoon
Salt-as per taste
Oil-4 tablespoon
Garam masala powder-1 teaspoon
Coconut milk-1/2 cup Preparation:
Add oil in a pan and fry onion paste till the oil oozes out.Add green chilies,ginger garlic paste,coriander powder,cumin powder and turmeric powder fry it for 5 mins.Then add chili powder,salt and water(1cup).
Now add fish pieces and let it cook for 10 mins in medium flame. Then add coconut milk and cook for 5 mins.finally add garam masala. Enjoy cooking | | CHICKEN DRUMSTICK CURRY Mar 11th 2016, 02:41, by noreply@blogger.com (Sirisha) CHICKEN DRUMSTICK FRY Ingredients
Chicken drumsticks-6
Ginger garlic paste-1 tablespoon
Coriander powder-1 tablespoon
Cumin powder-1/2 teaspoon
Chili powder-1 tablespoon
Salt- as per taste
Turmeric powder-1/4 teaspoon
Garam masala-1 teaspoon
Oil- for deep frying
Lemon juice-1 teaspoon Preparation:
Marinate chicken drumsticks with turmeric,chili powder,salt,coriander powder,cumin powder,ginger garlic paste,garam masala and lemon juice for 10 mins.
Cook the marinated chicken drumsticks by adding very little amount of water for 10 mins until the water evaporates.Then switch off the flame and let it cool.
Add oil in another pan and fry the chicken drumsticks till golden brown.
It tastes good with sambar. Enjoy cooking | | PEETALU PULUSU Mar 11th 2016, 02:33, by noreply@blogger.com (Sirisha) PEETALU PULUSU
Ingredients:
Peetalu(crab)-4
Onion (paste)-2 (medium)
Ginger garlic paste-1 tablespoon
Green chilies-4
Coriander powder-1 tablespoon
Cumin powder-1/2 teaspoon
Chili powder-1 tablespoon
Turmeric powder-1/4 teaspoon
Salt-as per taste
Oil-4 tablespoon
Brinjal(slices)-1
Tamarind-1 big lemon size
Coriander leaves- for garnish Preparation:
Add oil in a pan and fry onion paste till the oil oozes out.Add ginger garlic paste,coriander powder,cumin powder,turmeric and brinjal slices and fry them for 5 mins.add chili powder and salt.
Now add crab pieces, cover the lid and let it cook for 2 mins. Then add tamarind juice (3cups) and cook for 10 mins in medium flame,another 5 mins in low flame.garnish with coriander leaves. Enjoy cooking | | CHEPALA PULUSU Mar 11th 2016, 02:30, by noreply@blogger.com (Sirisha) CHEPALA PULUSU INGREDIENTS: Fish(Tilapia)-2lbs
onion paste-2 medium onions
ginger garlic paste-1 table spoon
coriander powder-1 table spoon
cumin powder-half tea spoon
green chilies-5
turmeric powder-half tea spoon
chili powder-1 table spoon
salt- as per taste
oil-5 table spoons
tamarind-big lemon size(soak in water)
coriander leaves for garnish PREPARATION: Add oil in a pan. Fry onion paste and chilies till oil oozes out. Add turmeric powder,ginger garlic paste and fry them for 5 mins. Then add coriander powder,cumin powder,salt and chili powder,fry them for 2 mins. Now add tamarind juice(3 cups) ,let it cook for 2 mins and then add fish pieces.cover the lid and cook for 10 mins on medium flame until oil comes out. Garnish with coriander leaves. Enjoy cooking
| | Chicken Tikka Biryani Recipe. Mar 11th 2016, 02:30, by noreply@blogger.com (Gloria Fernandes) One of my favourite Biryani.. Chicken Tikka Biryani...A very flavourful and delicious biryani with chicken tikka chunks and aromatic basmati rice cooked to perfection..This chicken tikka biryani has got a yummy flavour as we use charcoal for the coal aroma which gives you the feel of having tandoori/ tikka made on a clay tandoor.. Chicken tikka biryani recipe is slightly different than the other biryanis more or less same as my tandoori chicken biryani which is already shared on the blog.Unlike other biryani the chicken tikka chunks are grilled/cooked separately and later arranged on layer above the rice and gravy.. Do try it out you will love it ..Use the best quality basmati rice for better results..this chicken tikka biryani goes well with any raita /salad.. I enjoyed it with mince potato chops and some fried chicken .. Ingredientsfor the tikka 1/2 chicken boneless 1 tsp lime juice 1 1/2 tsp ginger galric paste 1tsp kashmiri chilli powder 1/2 tsp garam masala powder 1/4 cup curds/yogurt/dahi salt for the rice1/2 kg basmati rice 2 bay leaves 1/2 tsp balck cumin seeds/shahi jeera 2-3 cardamom salt for the gravy1 tsp ginger garlic paste 1/4 cup curds/yogurt/dahi 3 onions sliced 2- tomato sliced 1 tsp red chilli powder 1 tsp garam masala powder 1 tsp coriander powder 1/2 tsp cumin powder 4-5 green chilies/chopped or slited oil for layeringcoriander leaves mint leaves crispy fried onion nuts as needed rose water 1/2 tsp fennel powder(optional) 1/4 tssp nutmeg powder safrron infused in 1 tbsp milk orange food colour (optional) 1) Preparing the Chicken Tikka- Marinate chicken with the ingredients mentioned and set aside for 20 minutes minimum..
- Grill or cook it in a non stick pan using very little oil ,fry well till done.
- keep a coal burning till red hot ,place a aluminum foil in the pan where the chcken is fried keep the coal drizzle a drop of oil or ghee and cover the pan immediately to let the smoke infuse in the chicken tikka.
- Keep it covered for atleast 5-7 minutes.
- Remove the foil carefully.
2) Cooking the rice- Take a vessel fill it with water around 4-5 cups add salt
- Let the water come to a boil
- Add bay leaves,cardamom and shahi jeera
- Add the soaked ,drained rice and cook till 3/4 th done .
- Drain the excess water by removing the rice in a colander.
3) Making the gravy- Heat oil and fry the onions till crisp and golden brown keep some for layering.
- heat oil in a pan ,add ginger garlic paste cook till raw smell ogoes off
- Add the sliced tomatoes and green chillies ,cook till soft and mushy
- Add the fried brown onions and saute for few minutes
- Now miz in the leftover marinade to the beaten 1/4 cup curds and the coriander,cumin ,chilli powder and garam masala powder.
- Saute till the oil releases from the masala.
- Add about 1 1/2 cup water and let ti come to a boil
- You can add more water if you find the gravy too thick, also add salt if required
4) Assembling the biryani- Heat a iron griddle/tava on the gas stove.
- In the vessel which you are using to layer biryani heat 1 tbsp oil/ghee
- Arrange half layer of rice
- Top it with fried onions ,coriander mint leaves and also add fennel and nutmeg powder.
- Arrane the gravy over the rice and place the chicken tikka over the gravy
- Now arrange the remaining half layer of rice.
- Top it with coriander,mint leaves and fried onions
- Sprinkle rose water ,1 1/2 tsp melted ghee,nuts , saffron infused in milk and few drops of orange food colour.
- Cover the vessel with an aluminium foil and place the lid over it.
- Keep the biryani pot/vessel over the hot iron griddle and cook on dum for 20 minutes
- If not using tava under the vessel ,cook on high flame for 10 minutes then on low flame for 10 minutes.
- Serve it hot with raita/salad of your choice.
| | Low carb bread sticks (Keto/paleo) Mar 11th 2016, 00:26, by bodyenergyaction  Hello everybody! How are you today? Hello everybody! How are you today?
I have a great snack recipe for you. It’s a crunchy and super tasty bread stick, that you can have with your favorite dip, or just by it’s own. The recipe I have it from the Keto diet app, and I have to admit it’s the best recipe I found. Here are the ingredients: - 1 cup almond flour
- 1 cup flexmeal
- 1/4 cup coconut flour
- 2 tbsp psyllium husk
- 2 tbs chia seeds (grounded)
- 1tbs salt
- 1 cup water
Instructions: - Mix all the ingredients
- Leave it in the fridge for 15-20 minutes
- Preheat the oven to 350 F (175 C)
- Wet your fingers and roll&press the dough to form breadsticks
- Place on a baking sheet, brush them with egg yolks and sprinkle with rosemary, hempseed, salt, chia seeds
- bake for 15-20 minutes, until crispy
- Enjoy the with salsa, guacamole, BBQ sauce!

| | Instant oats idly Mar 10th 2016, 23:22, by noreply@blogger.com (seema doraiswamy) Oats being rich in fibre is a super health option.
Now in my house.....the oat porridge is not a favourite for my husband. Well this allows me to play around with the ingredient a bit more...and mask the oaty stickiness. Steam cooked oats seems to be the best. Well so it turns up as oats idlies. Now in the morning buzz...let's turn it instant. You need One cup of rolled oats powdered coarsely
Half cup roasted semolina
One cup buttermilk
Water as necessary
Half tsp eno/fruit salt
Salt to taste. Method It's a good store ...oats powder. To make it, lightly roast the rolled oats and powder it in your spice grinder. I seive out the fine powder and use as a thickener for soups. The coarse powder is ideal for idlies, upma or even dosa.
To make the idlies
Into the mixing bowl, add one cup of the coarse powder oat, half cup roasted semolina and salt to taste...keep in mind the addition of the yogurt.
The roasted semolina gives the idlies a lift while steaming and make them more fluffy.
Now into the dry mix add buttermilk and mix well, the mixture is now thick, add water to make it into a pouring honey consistency. Set aside for 10minutes.
The grains and semolina will absorb the liquids and puff up. Again you can see that.the mixture becomes thicker. Now add water one spoon at a time..just to bring to a lumpy consistency. ....
Add fruit salt/eno mix well and pour into moulds,, set in steamer.
Steam for 15minutes in medium heat.
Cool for 5-10minutes, mould and serve with a chutney/ sambhar/rasam..of choice.
I have served it here with a light tomato rasam.
 | |


")


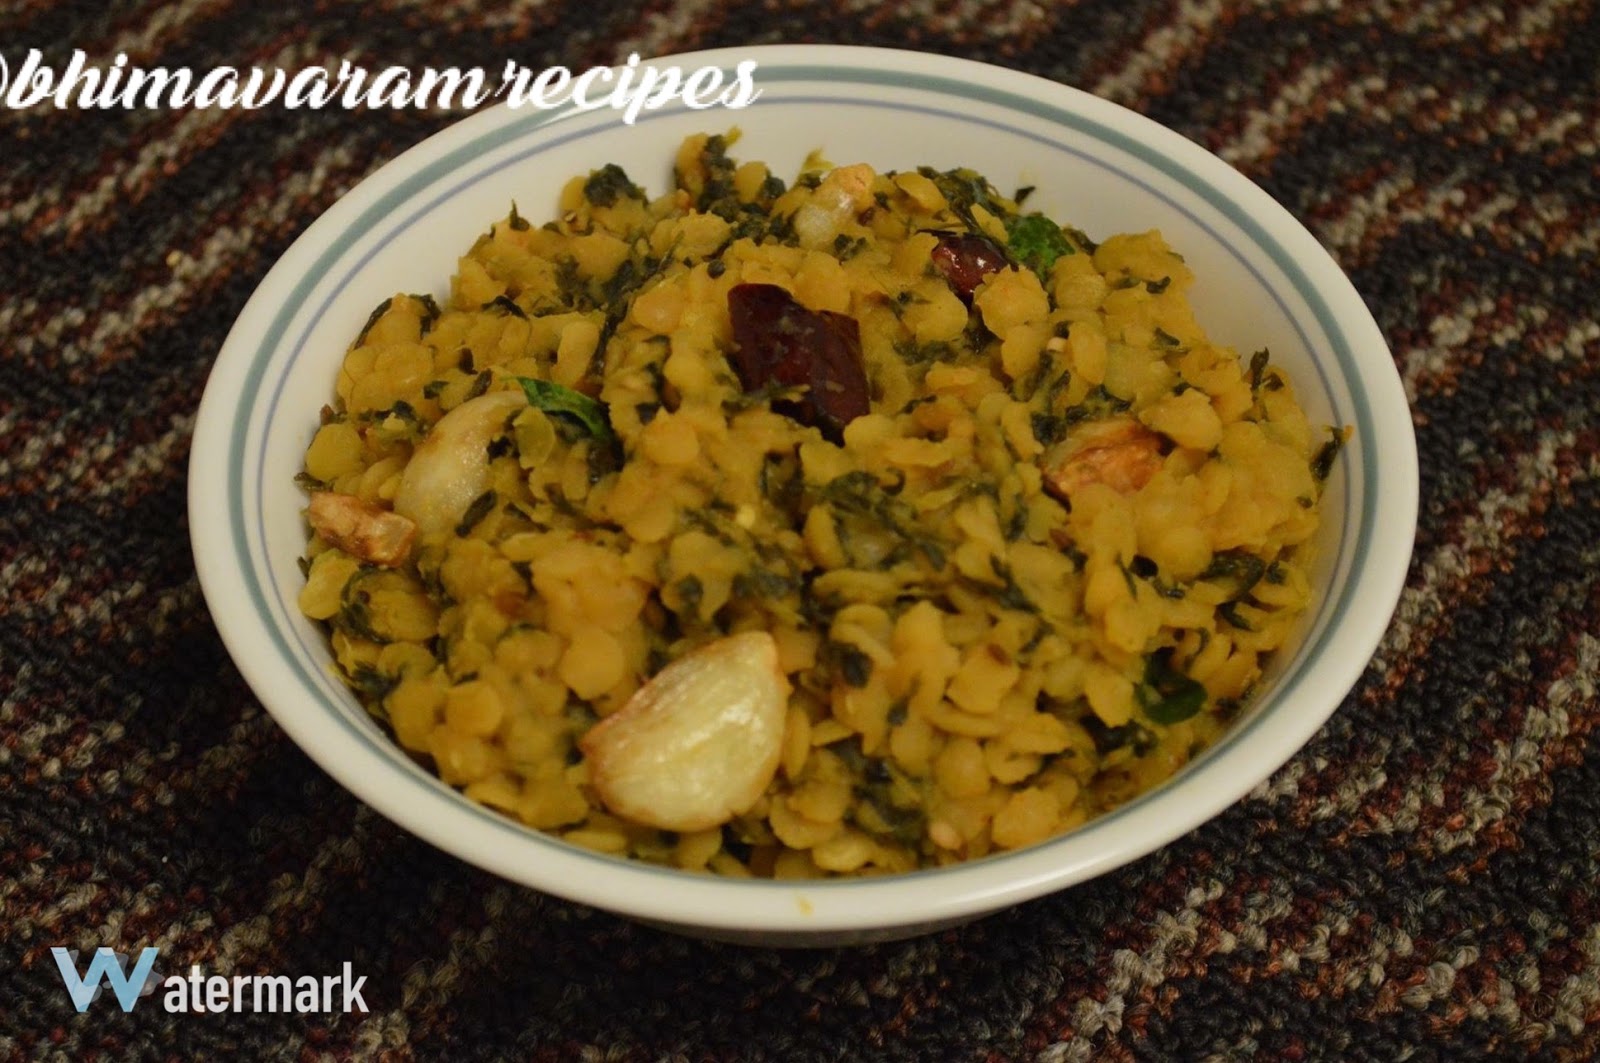


Recipes: All Items ~ Healthy Tips Update >>>>> Download Now
ReplyDelete>>>>> Download Full
Recipes: All Items ~ Healthy Tips Update >>>>> Download LINK
>>>>> Download Now
Recipes: All Items ~ Healthy Tips Update >>>>> Download Full
>>>>> Download LINK KQ